

Baeldung Pro comes with both absolutely No-Ads as well as finally with Dark Mode, for a clean learning experience:
Once the early-adopter seats are all used, the price will go up and stay at $33/year.
Baeldung Pro comes with both absolutely No-Ads as well as finally with Dark Mode, for a clean learning experience:
Once the early-adopter seats are all used, the price will go up and stay at $33/year.
Azure Container Apps is a fully managed serverless container service that enables you to build and deploy modern, cloud-native Java applications and microservices at scale. It offers a simplified developer experience while providing the flexibility and portability of containers.
Of course, Azure Container Apps has really solid support for our ecosystem, from a number of build options, managed Java components, native metrics, dynamic logger, and quite a bit more.
To learn more about Java features on Azure Container Apps, visit the documentation page.
You can also ask questions and leave feedback on the Azure Container Apps GitHub page.
Azure Container Apps is a fully managed serverless container service that enables you to build and deploy modern, cloud-native Java applications and microservices at scale. It offers a simplified developer experience while providing the flexibility and portability of containers.
Of course, Azure Container Apps has really solid support for our ecosystem, from a number of build options, managed Java components, native metrics, dynamic logger, and quite a bit more.
To learn more about Java features on Azure Container Apps, you can get started over on the documentation page.
And, you can also ask questions and leave feedback on the Azure Container Apps GitHub page.
Modern software architecture is often broken. Slow delivery leads to missed opportunities, innovation is stalled due to architectural complexities, and engineering resources are exceedingly expensive.
Orkes is the leading workflow orchestration platform built to enable teams to transform the way they develop, connect, and deploy applications, microservices, AI agents, and more.
With Orkes Conductor managed through Orkes Cloud, developers can focus on building mission critical applications without worrying about infrastructure maintenance to meet goals and, simply put, taking new products live faster and reducing total cost of ownership.
Try a 14-Day Free Trial of Orkes Conductor today.
Mocking is an essential part of unit testing, and the Mockito library makes it easy to write clean and intuitive unit tests for your Java code.
Get started with mocking and improve your application tests using our Mockito guide:
Handling concurrency in an application can be a tricky process with many potential pitfalls. A solid grasp of the fundamentals will go a long way to help minimize these issues.
Get started with understanding multi-threaded applications with our Java Concurrency guide:
Spring 5 added support for reactive programming with the Spring WebFlux module, which has been improved upon ever since. Get started with the Reactor project basics and reactive programming in Spring Boot:
Since its introduction in Java 8, the Stream API has become a staple of Java development. The basic operations like iterating, filtering, mapping sequences of elements are deceptively simple to use.
But these can also be overused and fall into some common pitfalls.
To get a better understanding on how Streams work and how to combine them with other language features, check out our guide to Java Streams:
Explore Spring Boot 3 and Spring 6 in-depth through building a full REST API with the framework:
Yes, Spring Security can be complex, from the more advanced functionality within the Core to the deep OAuth support in the framework.
I built the security material as two full courses - Core and OAuth, to get practical with these more complex scenarios. We explore when and how to use each feature and code through it on the backing project.
You can explore the course here:
All Access is finally out, with all of my Spring courses. Learn JUnit is out as well, and Learn Maven is coming fast. And, of course, quite a bit more affordable. Finally.
>> GET THE COURSESpring Data JPA is a great way to handle the complexity of JPA with the powerful simplicity of Spring Boot.
Get started with Spring Data JPA through the guided reference course:
End-to-end testing is a very useful method to make sure that your application works as intended. This highlights issues in the overall functionality of the software, that the unit and integration test stages may miss.
Playwright is an easy-to-use, but powerful tool that automates end-to-end testing, and supports all modern browsers and platforms.
When coupled with LambdaTest (an AI-powered cloud-based test execution platform) it can be further scaled to run the Playwright scripts in parallel across 3000+ browser and device combinations:
Yes, we're now running our Spring Sale. All Courses are 25% off until 26th May, 2025:
Yes, we're now running our Spring Sale. All Courses are 25% off until 26th May, 2025:
If you're working on a Spring Security (and especially an OAuth) implementation, definitely have a look at the Learn Spring Security course:
>> LEARN SPRING SECURITYOAuth is an open standard that describes a process of authorization. It can be used to authorize user access to an API. For example, a REST API can restrict access to only registered users with a proper role.
An OAuth authorization server is responsible for authenticating the users and issuing access tokens containing the user data and proper access policies.
In this tutorial, we’ll implement a simple OAuth application using the Spring Security OAuth Authorization Server project.
In the process, we’ll create a client-server application that will fetch a list of Baeldung articles from a REST API. Both the client services and server services will require an OAuth authentication.
We’ll start by looking at the OAuth authorization server configuration. It’ll serve as an authentication source for both the article resource and client servers.
First, we’ll need to add a few dependencies to our pom.xml file:
<dependency>
    <groupId>org.springframework.boot</groupId>
    <artifactId>spring-boot-starter-web</artifactId>
    <version>3.2.2</version>
</dependency>
<dependency>
    <groupId>org.springframework.boot</groupId>
    <artifactId>spring-boot-starter-security</artifactId>
    <version>3.2.2</version>
</dependency>
<dependency>
    <groupId>org.springframework.boot</groupId>
    <artifactId>spring-boot-starter-oauth2-authorization-server</artifactId>
    <version>3.2.2</version>
</dependency>First, we’ll create an application.yml file to specify the port that our auth server will run on by setting the server.port property:
server:
  port: 9000
Next, since each authorization server needs to have a unique issuer URL, we’ll set ours up with a localhost alias of http://auth-server on port 9000 by setting the spring.security.oauth2.authorizationserver.issuer property:
spring:
  security:
    oauth2:
      authorizationserver:
        issuer: http://auth-server:9000
In addition, we’ll add an entry “127.0.0.1 auth-server” in our /etc/hosts file. This allows us to run the client and the auth server on our local machine and avoids problems with session cookie overwrites between the two.
Finally, we’ll configure the repository of client services. In our example, we’ll have a single client named articles-client:
spring:
  security:
    oauth2:
      authorizationserver:
        client:
          articles-client:
            registration:
              client-id: articles-client
              client-secret: "{noop}secret"
              client-name: Articles Client
              client-authentication-methods:
                - client_secret_basic
              authorization-grant-types:
                - authorization_code
                - refresh_token
              redirect-uris:
                - http://127.0.0.1:8080/login/oauth2/code/articles-client-oidc
                - http://127.0.0.1:8080/authorized
              scopes:
                - openid
                - articles.read
The properties we’re configuring are:
Then we can move to the Spring Beans configuration. First, we’ll enable the Spring web security module with a @Configuration and an @EnableWebSecurity annotated configuration class:
@Configuration
@EnableWebSecurity
public class DefaultSecurityConfig {
    // ...
}
Next, we’ll configure a Spring Security filter chain to apply the default OAuth security and generate a default form login page:
@Bean
@Order(1)
SecurityFilterChain authorizationServerSecurityFilterChain(HttpSecurity http) throws Exception {
    OAuth2AuthorizationServerConfiguration.applyDefaultSecurity(http);
    http.getConfigurer(OAuth2AuthorizationServerConfigurer.class)
      .oidc(withDefaults()); // Enable OpenID Connect 1.0
    return http.formLogin(withDefaults()).build();
}
Then we’ll configure the second Spring Security filter chain for authentication:
@Bean
@Order(2)
SecurityFilterChain defaultSecurityFilterChain(HttpSecurity http) throws Exception {
    http.authorizeHttpRequests(authorizeRequests -> authorizeRequests.anyRequest()
          .authenticated())
      .formLogin(withDefaults());
    return http.build();
}
Here we’re calling authorizeRequests.anyRequest().authenticated() to require authentication for all requests. We’re also providing a form-based authentication by invoking the formLogin(defaults()) method.
Finally, we’ll define a set of example users that we’ll use for testing. For the sake of this example, we’ll create a repository with just a single admin user:
@Bean
UserDetailsService users() {
    PasswordEncoder encoder = PasswordEncoderFactories.createDelegatingPasswordEncoder();
    UserDetails user = User.builder()
      .username("admin")
      .password("password")
      .passwordEncoder(encoder::encode)
      .roles("USER")
      .build();
    return new InMemoryUserDetailsManager(user);
}Now we’ll create a resource server that will return a list of articles from a GET endpoint. The endpoints should allow only requests that are authenticated against our OAuth server.
First, we’ll include the required dependencies:
<dependency>
    <groupId>org.springframework.boot</groupId>
    <artifactId>spring-boot-starter-web</artifactId>
    <version>3.2.2</version>
</dependency>
<dependency>
    <groupId>org.springframework.boot</groupId>
    <artifactId>spring-boot-starter-security</artifactId>
    <version>3.2.2</version>
</dependency>
<dependency>
    <groupId>org.springframework.boot</groupId>
    <artifactId>spring-boot-starter-oauth2-resource-server</artifactId>
    <version>3.2.2</version>
</dependency>Before we start with the implementation code, we should configure some properties in the application.yml file. The first one is the server port:
server:
  port: 8090
Next, it’s time for the security configuration. We need to set up the proper URL for our authentication server with the host and the port we’ve configured in the ProviderSettings bean earlier:
spring:
  security:
    oauth2:
      resourceserver:
        jwt:
          issuer-uri: http://auth-server:9000
Now we can set up our web security configuration. Again, we want to explicitly state that every request to article resources should be authorized and have the proper articles.read authority:
@Configuration
@EnableWebSecurity
public class ResourceServerConfig {

    @Bean
    SecurityFilterChain securityFilterChain(HttpSecurity http) throws Exception {
        http.securityMatcher("/articles/**")
          .authorizeHttpRequests(authorize -> authorize.anyRequest()
            .hasAuthority("SCOPE_articles.read"))
          .oauth2ResourceServer(oauth2 -> oauth2.jwt(Customizer.withDefaults()));
        return http.build();
    }
}
As shown here, we’re also invoking the oauth2ResourceServer() method, which will configure the OAuth server connection based on the application.yml configuration.
Finally, we’ll create a REST controller that will return a list of articles under the GET /articles endpoint:
@RestController
public class ArticlesController {

    @GetMapping("/articles")
    public String[] getArticles() {
        return new String[] { "Article 1", "Article 2", "Article 3" };
    }
}For the last part, we’ll create a REST API client that will fetch the list of articles from the resource server.
To start, we’ll include the necessary dependencies:
<dependency>
    <groupId>org.springframework.boot</groupId>
    <artifactId>spring-boot-starter-web</artifactId>
    <version>3.2.2</version>
</dependency>
<dependency>
    <groupId>org.springframework.boot</groupId>
    <artifactId>spring-boot-starter-security</artifactId>
    <version>3.2.2</version>
</dependency>
<dependency>
    <groupId>org.springframework.boot</groupId>
    <artifactId>spring-boot-starter-oauth2-client</artifactId>
    <version>3.2.2</version>
</dependency>
<dependency>
    <groupId>org.springframework</groupId>
    <artifactId>spring-webflux</artifactId>
    <version>6.1.3</version>
</dependency>
<dependency>
    <groupId>io.projectreactor.netty</groupId>
    <artifactId>reactor-netty</artifactId>
    <version>1.1.15</version>
</dependency>
As we did earlier, we’ll define some configuration properties for authentication purposes:
server:
  port: 8080

spring:
  security:
    oauth2:
      client:
        registration:
          articles-client-oidc:
            provider: spring
            client-id: articles-client
            client-secret: secret
            authorization-grant-type: authorization_code
            redirect-uri: "http://127.0.0.1:8080/login/oauth2/code/{registrationId}"
            scope: openid
            client-name: articles-client-oidc
          articles-client-authorization-code:
            provider: spring
            client-id: articles-client
            client-secret: secret
            authorization-grant-type: authorization_code
            redirect-uri: "http://127.0.0.1:8080/authorized"
            scope: articles.read
            client-name: articles-client-authorization-code
        provider:
          spring:
            issuer-uri: http://auth-server:9000
Now we’ll create a WebClient instance to perform HTTP requests to our resource server. We’ll use the standard implementation with just one addition of the OAuth authorization filter:
@Bean
WebClient webClient(OAuth2AuthorizedClientManager authorizedClientManager) {
    ServletOAuth2AuthorizedClientExchangeFilterFunction oauth2Client =
      new ServletOAuth2AuthorizedClientExchangeFilterFunction(authorizedClientManager);
    return WebClient.builder()
      .apply(oauth2Client.oauth2Configuration())
      .build();
}
The WebClient requires an OAuth2AuthorizedClientManager as a dependency. Let’s create a default implementation:
@Bean
OAuth2AuthorizedClientManager authorizedClientManager(
        ClientRegistrationRepository clientRegistrationRepository,
        OAuth2AuthorizedClientRepository authorizedClientRepository) {

    OAuth2AuthorizedClientProvider authorizedClientProvider =
      OAuth2AuthorizedClientProviderBuilder.builder()
        .authorizationCode()
        .refreshToken()
        .build();
    DefaultOAuth2AuthorizedClientManager authorizedClientManager = new DefaultOAuth2AuthorizedClientManager(
      clientRegistrationRepository, authorizedClientRepository);
    authorizedClientManager.setAuthorizedClientProvider(authorizedClientProvider);

    return authorizedClientManager;
}
Lastly, we’ll configure web security:
@Configuration
@EnableWebSecurity
public class SecurityConfig {

    @Bean
    SecurityFilterChain securityFilterChain(HttpSecurity http) throws Exception {
        http
          .authorizeHttpRequests(authorizeRequests ->
            authorizeRequests.anyRequest().authenticated()
          )
          .oauth2Login(oauth2Login ->
            oauth2Login.loginPage("/oauth2/authorization/articles-client-oidc"))
          .oauth2Client(withDefaults());
        return http.build();
    }
}
Here, as well as in other servers, we’ll need every request to be authenticated. Additionally, we need to configure the login page URL (defined in .yml config) and the OAuth client.
Finally, we can create the data access controller. We’ll use the previously configured WebClient to send an HTTP request to our resource server:
@RestController
public class ArticlesController {

    private WebClient webClient;

    @GetMapping(value = "/articles")
    public String[] getArticles(
      @RegisteredOAuth2AuthorizedClient("articles-client-authorization-code") OAuth2AuthorizedClient authorizedClient
    ) {
        return this.webClient
          .get()
          .uri("http://127.0.0.1:8090/articles")
          .attributes(oauth2AuthorizedClient(authorizedClient))
          .retrieve()
          .bodyToMono(String[].class)
          .block();
    }
}
In the above example, we’re taking the OAuth authorization token from the request in a form of OAuth2AuthorizedClient class. It’s automatically bound by Spring using the @RegisterdOAuth2AuthorizedClient annotation with proper identification. In our case, it’s pulled from the article-client-authorizaiton-code that we configured previously in the .yml file.
This authorization token is further passed to the HTTP request.
Now when we go into the browser and try to access the http://127.0.0.1:8080/articles page, we’ll be automatically redirected to the OAuth server login page under http://auth-server:9000/login URL:
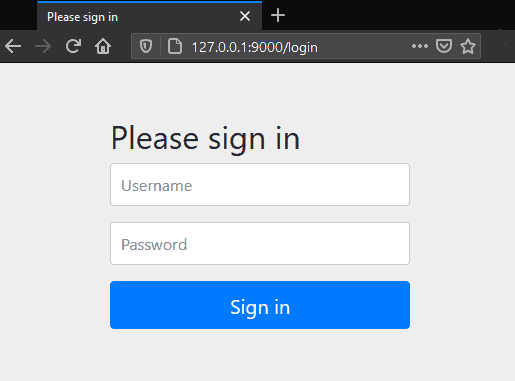
After providing the proper username and password, the authorization server will redirect us back to the requested URL, the list of articles.
Further requests to the articles endpoint won’t require logging in, as the access token will be stored in a cookie.
In this article, we learned how to set up, configure, and use the Spring Security OAuth Authorization Server.
Baeldung Pro comes with both absolutely No-Ads as well as finally with Dark Mode, for a clean learning experience:
Once the early-adopter seats are all used, the price will go up and stay at $33/year.
Azure Container Apps is a fully managed serverless container service that enables you to build and deploy modern, cloud-native Java applications and microservices at scale. It offers a simplified developer experience while providing the flexibility and portability of containers.
Of course, Azure Container Apps has really solid support for our ecosystem, from a number of build options, managed Java components, native metrics, dynamic logger, and quite a bit more.
To learn more about Java features on Azure Container Apps, visit the documentation page.
You can also ask questions and leave feedback on the Azure Container Apps GitHub page.
Modern software architecture is often broken. Slow delivery leads to missed opportunities, innovation is stalled due to architectural complexities, and engineering resources are exceedingly expensive.
Orkes is the leading workflow orchestration platform built to enable teams to transform the way they develop, connect, and deploy applications, microservices, AI agents, and more.
With Orkes Conductor managed through Orkes Cloud, developers can focus on building mission critical applications without worrying about infrastructure maintenance to meet goals and, simply put, taking new products live faster and reducing total cost of ownership.
Try a 14-Day Free Trial of Orkes Conductor today.
The Apache HTTP Client is a very robust library, suitable for both simple and advanced use cases when testing HTTP endpoints. Check out our guide covering basic request and response handling, as well as security, cookies, timeouts, and more:
Handling concurrency in an application can be a tricky process with many potential pitfalls. A solid grasp of the fundamentals will go a long way to help minimize these issues.
Get started with understanding multi-threaded applications with our Java Concurrency guide:
Since its introduction in Java 8, the Stream API has become a staple of Java development. The basic operations like iterating, filtering, mapping sequences of elements are deceptively simple to use.
But these can also be overused and fall into some common pitfalls.
To get a better understanding on how Streams work and how to combine them with other language features, check out our guide to Java Streams:
Get started with Spring Boot and with core Spring, through the Learn Spring course:
Yes, we're now running our Spring Sale. All Courses are 25% off until 26th May, 2025:
Yes, we're now running our Spring Sale. All Courses are 25% off until 26th May, 2025:
I just announced the new Learn Spring Security course, including the full material focused on the new OAuth2 stack in Spring Security:
Azure Container Apps is a fully managed serverless container service that enables you to build and deploy modern, cloud-native Java applications and microservices at scale. It offers a simplified developer experience while providing the flexibility and portability of containers.
Of course, Azure Container Apps has really solid support for our ecosystem, from a number of build options, managed Java components, native metrics, dynamic logger, and quite a bit more.
To learn more about Java features on Azure Container Apps, visit the documentation page.
You can also ask questions and leave feedback on the Azure Container Apps GitHub page.


